Managing bookings in Microsoft 365
If you find yourself tired of frequently scheduling appointments using Outlook manually, consider trying the booking features included in Microsoft 365 (M365).
In this blog, we’ll look at the Microsoft Bookings and ‘Booking with me’ in Outlook and how they differ from traditional appointment scheduling.
What booking tool should I be using?
What booking tool to use will depend on whether you are offering bookings to internal UQ users, such as staff, or externals, such as consultants or future students.
Microsoft Bookings is approved for organising one-on-one services with external users like consultants or future students.
Bookings with me in Outlook is better for sharing a single user’s availability for one-on-one meetings with other internal UQ users, such as a group of staff.
When offering services to a wide internal audience, such as to all students or staff, the Student Hub appointment module is the recommended method.
Bookings with me - one-on-one appointment scheduling
The Bookings with me in Outlook feature allows a single user to share their availability for one-on-one appointments with internal and external users.
After you create your desired meeting types, you can share them with your intended meeting attendees. They can then book a timeslot according to both parties' availability. If availabilities change and one party can’t make the meeting, either party can request to reschedule the meeting to a new free time.
How to use Bookings with me – step by step
To use Bookings with me:
- Go to https://outlook.office.com/bookwithme/
- Create your desired meeting types, including setting your availability
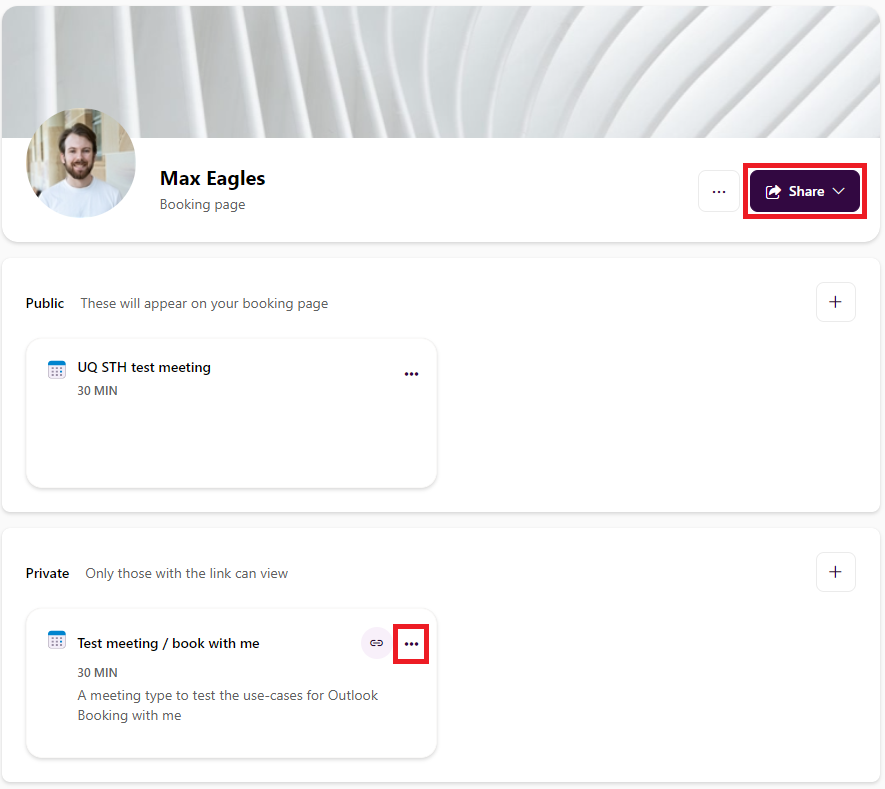
- Share your bookings page with would-be attendees by clicking Share (pictured below).
- You can also share Private meeting types by expanding the ellipsis menu (pictured below), then using one of the sharing options – Copy link, Copy single-use link, or Share.
For in-depth support on Bookings with me, visit Microsoft’s support page - Bookings with me: setup and sharing.
Microsoft Bookings – appointment scheduling with externals
Microsoft Bookings is a scheduling and appointment booking app that works with Microsoft 365. It includes a web-based booking calendar and integrates with Outlook to optimize calendar appointments, giving external users like consultants or future students the flexibility to book a time that works best for both parties.
At UQ, Microsoft Bookings is approved for organising one-on-one services with external users like consultants or future students.
Introducing Microsoft Bookings
How to set up Microsoft Bookings at UQ
To start using Microsoft Bookings, request a new Bookings Calendar from ITS.
Once your Bookings Calendar has been created, you’ll be able to open it using the web app or the Bookings app in Teams. From there, you will be ready to add staff and create appointment types.
Adding staff to a Bookings Calendar
Adding staff to your Bookings Calendar allows you to assign them to appointment types. You can also share calendar administration responsibilities.
Microsoft has published instructions on how to add staff to Bookings.
Creating Services in a Booking Calendar
Once relevant team members have been added to the Booking Calendar, it is time to start creating the Services that will be offered.
Microsoft has published a guide on how to define your service offering in Bookings.
Creating an appointment in a Booking Calendar
Now that you have created the relevant services, and added staff to meet with, your Bookings Calendar is ready for appointments.
Using the booking webpage
To share your booking webpage with attendees:
- In Bookings, go to More options (...) > Settings > Booking page settings.
- Ensure the Publish booking page toggle is set to on.
- To share your booking page, click Email or Copy Link according to your preference.
Attendees will then be able to book appointments using the booking webpage.
Adding appointments manually
In addition to the booking webpage, all Calendar users besides Viewers can add appointments manually.
To create a new appointment:
- Click New appointment.
- Fill in the relevant information, including attendees, dates, staff, location and a confirmation message.
- Check any other relevant settings, including setting notifications prior to the appointment.
- Click Send.
Booking in M365 – summing up
If you have found a use for Microsoft’s Booking tools that improves your productivity, please share it with our Productivity Tips group.
Become a Change Champion
If you are passionate about digital tools adoption at UQ, please register your interest in the M365 Change Champion network. As a member, you’ll be invited to contribute to the digital tool adoption efforts at the University. If you would be interested in joining the program, please complete our EOI form.